Pi-hole Under Xfinity
This guide will walk you through a “hack” for setting up the Pi-hole on a network that uses an Xfinity modem/router.
Getting the Pi-hole to work with Xfinity hardware can be tricky for two reasons:
- Xfinity blocks you from changing the DNS settings of the device.
- Xfinity blocks you disabling the DHCP server function which blocks you from using the official workaround described here.
With neither of those options available, your fallback is to set the Pi-hole as the DNS server for each individual device on your network. However, this isn’t always possible. For example, if you have a Roku Smart TV, Roku blocks you from changing the DNS settings on the device too!
You’d think you’re shit out of luck at this point and have to dump some money on a new modem/router (not a terrible idea but costly). There is an alternative solution.
The Hack
The executive summary:
- Narrow the range of DHCP addresses served by the Xfinity DHCP server to a single address.
- Reserve that single address for the Pi-hole.
- Enable the DHCP server function of the Pi-hole.
Any new device that connects to the network gets an IP address from the Pi-hole DHCP server. All that device’s DNS request will get routed through the Pi-hole as desired. You don’t have to touch any additional settings on the Xfinity device nor any of the devices on your network!
Preparing the Pi-hole
This article assumes you have already installed the Pi-hole on a Raspberry Pi or other supported device. Further, you followed the warning on installation that has you set a static IP on the device.
To make life easier in the following steps, connect a keyboard, monitor, and mouse to the Pi-hole.
Enabling Configuration of Your Xfinity Modem/Router
To get started configuring your device, you’ll need access to both the Xfinity app and the admin web portal.
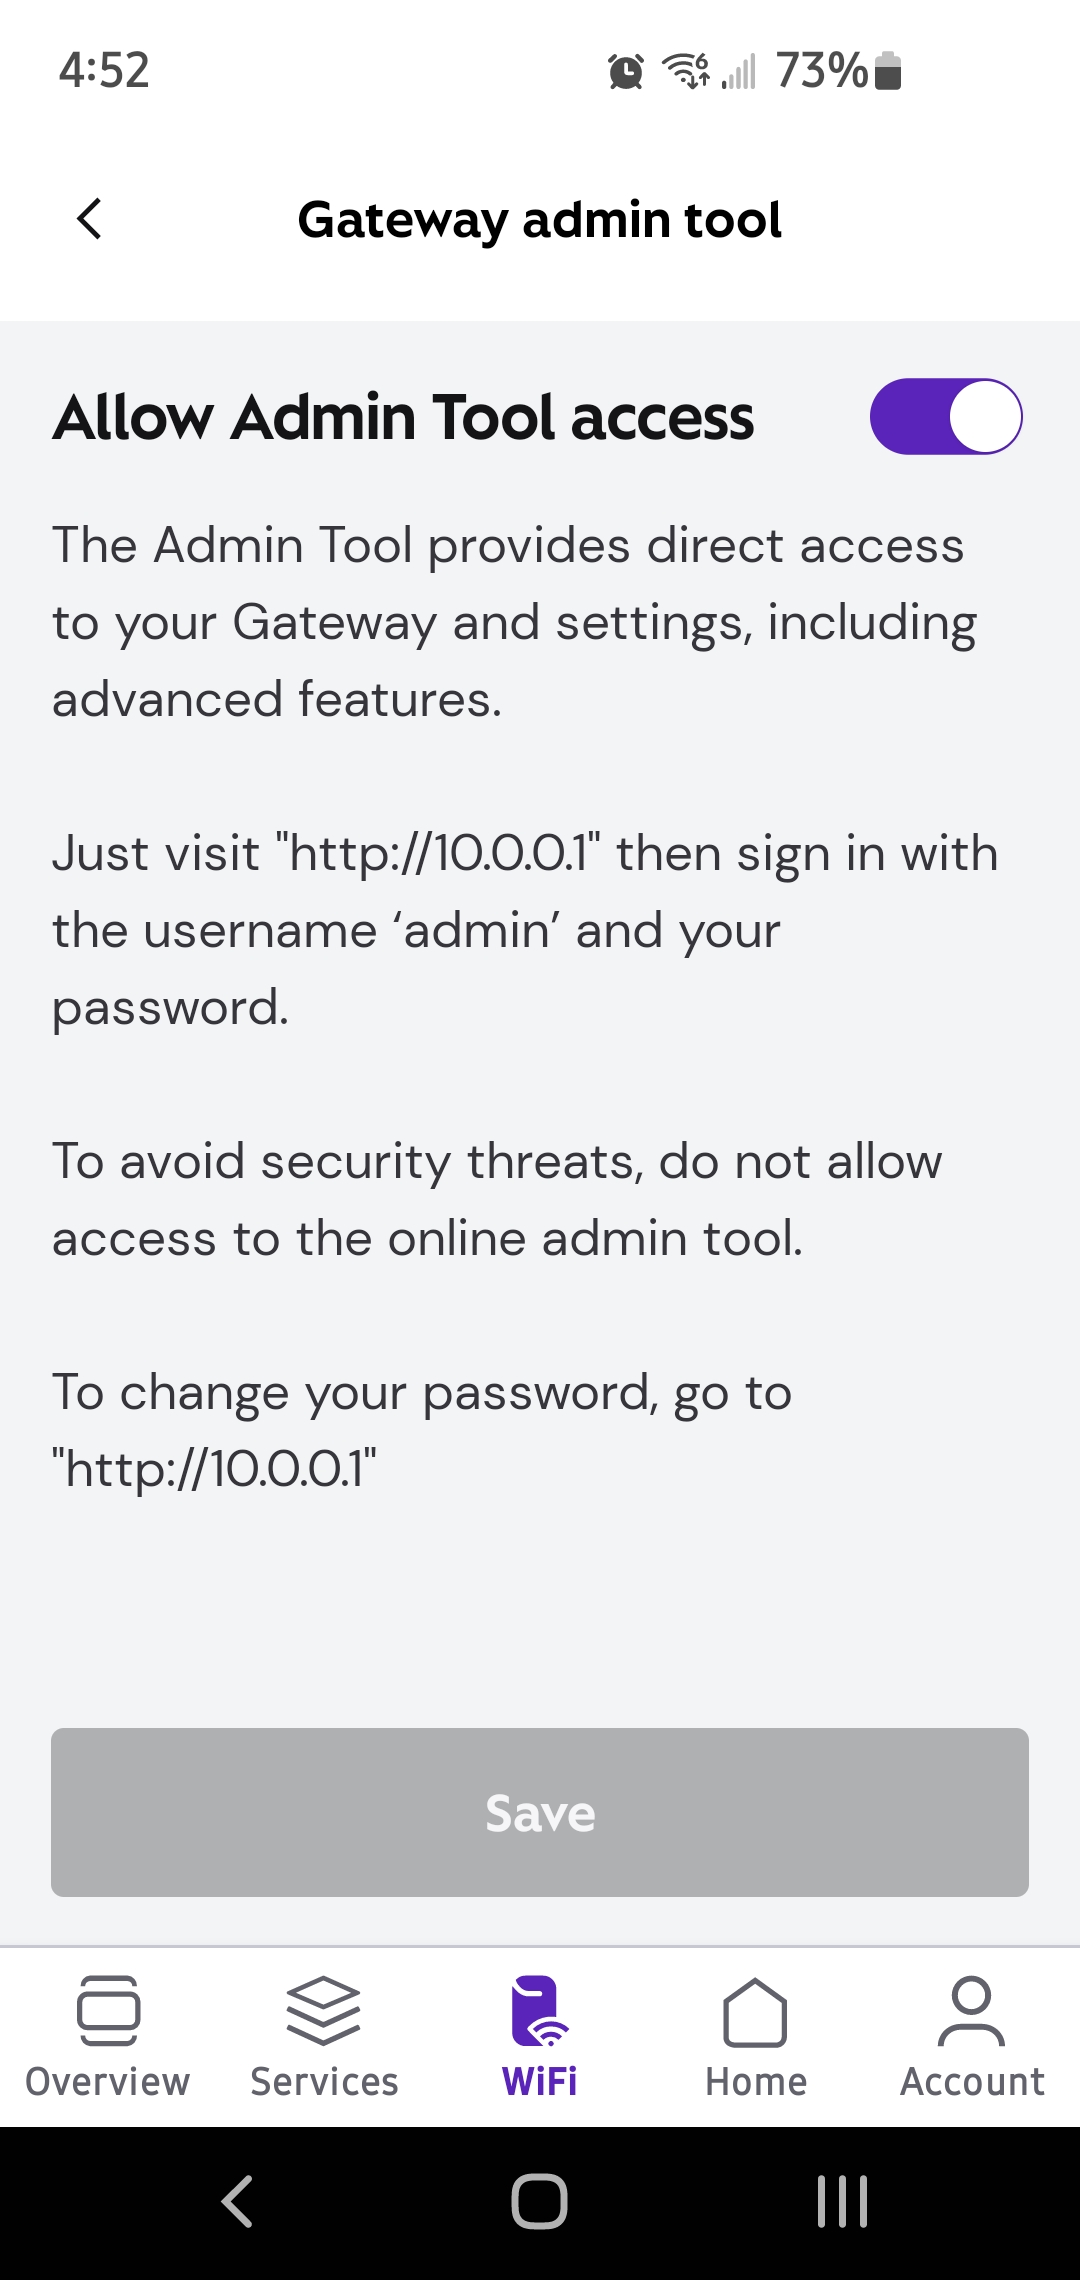
You can download the Xfinity app from the Google Play Store or Apple App Store. Once you have the app installed, scan the QR code on the bottom of the device to register it. Under your WiFi device, go to “Advanced Settings -> Gateway admin tool” and enable the admin web portal.
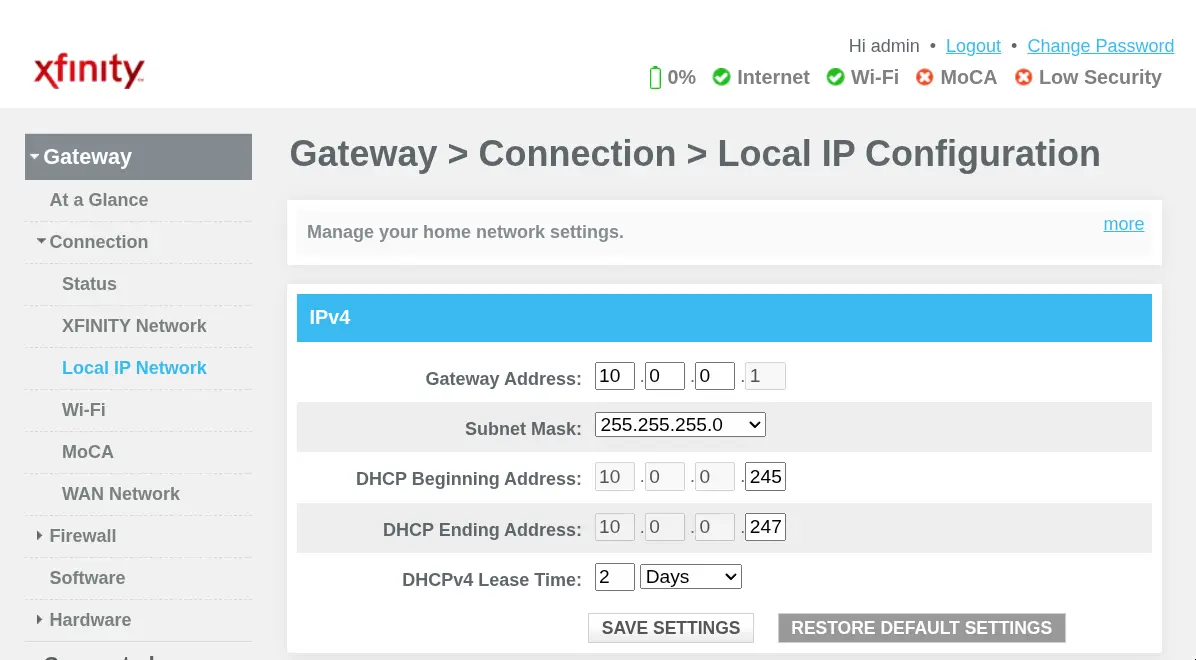
From a web browser on the Pi-hole device, navigate to https://10.0.0.1 and log
in with the credentials you set up in the Xfinity app. Navigate using the menu
on the left to “Gateway -> Connection -> Local IP Network.” You should see your
Xfinity device’s DHCP settings as shown below.
DHCP Setup
Follow these steps to configure DHCP both on the Xfinity device and the Pi-hole.
Disconnect all devices from the network except the Pi-hole device.
If you have port forwarding rules, jot down the rules and remove them. You can find the rules in the Xfinity app under “Advanced Settings -> Port forwarding.”

From the Xfinity app, select each “Disconnected Device” individually and select “Forget Device.” Note, that you might have to wait ~10 minutes for the device to show up in the app as a “Disconnected Device.” If you’re impatient, you can disconnect all devices and just reboot the gateway.

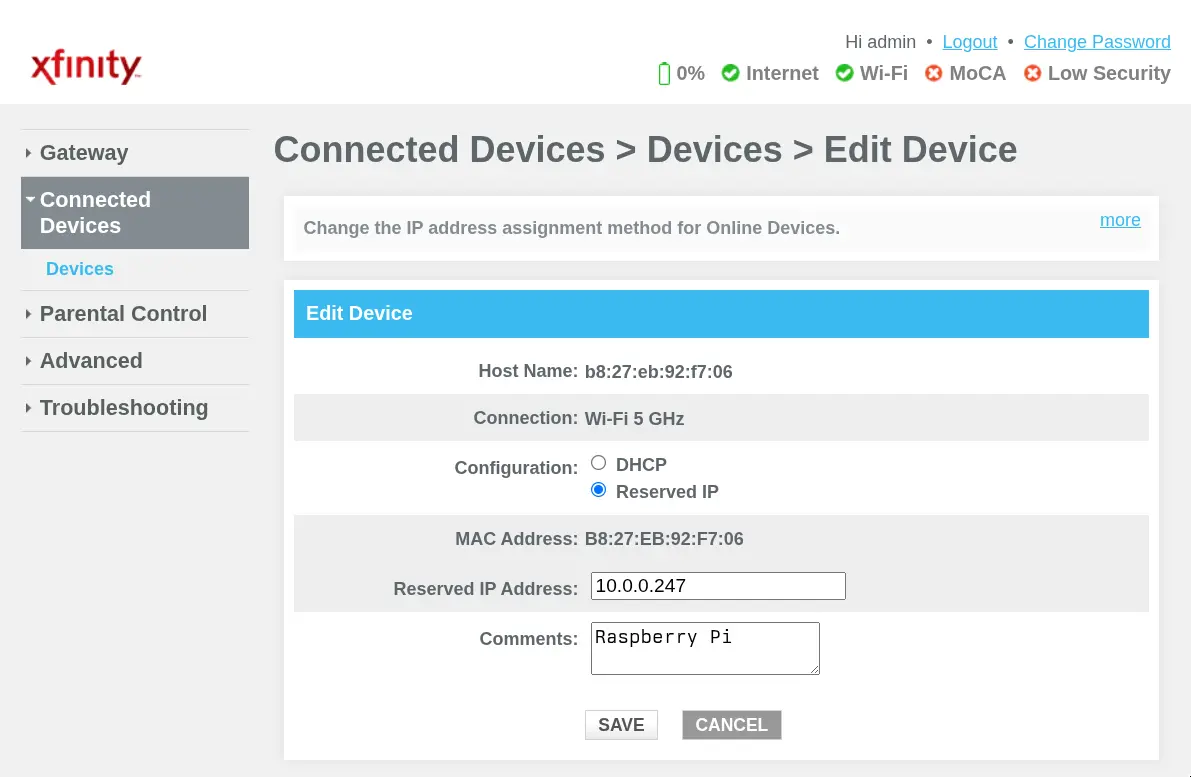
From the Xfinity admin portal, navigate to “Gateway -> Connected Devices.” Select the Pi-hole device and select “Reserve IP Address.”
From the Xfinity admin web portal, navigate to “Gateway -> Connection -> Local IP Network.” Change the “DHCP Start” and “DHCP End” addresses to a range that includes your Pi-hole’s static IP address. For example, if your Pi-hole has address
10.0.0.247, then you could set the “DHCP Start” to10.0.0.246and the “DHCP End” to10.0.0.247. If you had port forwarding rules, make sure the range of addresses includes one IP per machine that had a port forwarding rule.From the Pi-hole admin web portal, navigate to “Settings -> DHCP.” Enable the DHCP server and set the range of addresses. Make sure that the range does not overlap with the Xfinity DHCP range.

Reboot the Pi-hole device.
At this point, viewing the “Connected Devices” page of the Xfinity app, you should only see the Pi-hole device connected.
Reconnecting Devices
You’re now going to start reconnecting devices to the network. There’s two paths here: with port forwarding rules and without port forwarding rules.
With Port Forwarding Rules
- Reconnect each machine that had a rule first.
- Reconfigure each port forwarding rule using the Xfinity app.
- Connect all other devices to the network.
Without Port Forwarding Rules
- First, connect a device for which you can configure the DNS settings directly. For example, a Windows, Linux, or Mac desktop.
- From the Xfinity admin web portal, navigate to “Gateway -> Connections” and select the device you just connected. Select “Reserve IP Address.”
- Configure the device to use the Pi-hole as its DNS server.
- Connect all other devices to the network. No need to configure the DNS settings on any of these devices.
(1) is necessary because the DHCP start and end addresses can’t be the same. The Xfinity device therefore will always assign the second IP address in the range to the first device that connects to the network. As long as that device has configurable DNS, you can set it’s DNS to the Pi-hole and set its IP to reserved. That ensures that address is always filled by a device that uses the Pi-hole for DNS. All other devices will get an IP from the Pi-hole DHCP server and will automatically use the Pi-hole for DNS (even consumer-unfriendly Roku devices).